INTO THE MIDDLE DISTANCE
They came to the surface in bright red blotches, some the size of a fist, and in all the worst places--groin, armpits, nape of the neck, scalp. They erupted on the inside of the bottom lip, pushing the flesh forward into a collagen pout, Hollywood style.
Waiting in the emergency room lounge, she wondered if other people could see her hives ballooning under her clothes, like she could see the raw wound on the ankle of the man next to her. Yet most patients avoided eye contact, staring straight ahead into the middle distance or up at the wall-mounted television. They weren't looking at anything really, just waiting in silence for their turn with a doctor.
A few days later, the antihistamines and steroids had cleared up the hives, and the first round of allergy tests had revealed nothing. So, equipped with a bag full of EpiPens, she headed to the airport for the business trip to Texas, balancing her fears of another outbreak against the perky optimism of her sister.
"It's a one-off thing," her sister had said. "It'll never happen again. You're fine."
On the flight, half empty, the passengers sat quietly, many of them still groggy from the early morning departure. She greeted the travelers on either side, falling into conversation with the man in the window seat to her left. His accent marked him as a Southerner, Texan she assumed, although he quickly set her straight.
"Morgan City, Louisiana," he said. "But I'm going to Trinidad." In the oil business, he clarified, building platforms. Six weeks on, two weeks off.
He had left his wife up north with their son at the big university hospital there. "A blood disorder," he said. "We've been tracking him for six years now. It was finally time for the bone marrow transplant this summer. But I don't know. His white count keeps going down...." His voice trailed off as he looked down at the seat cushion separating them, a sort of no-man's land where answers might lie.
She offered a few words of sympathy, wondering if he could see in her, and in her words, the knowledge of sorrow she carried too. He turned toward the window and she to her book thinking that, maybe like the patients in the emergency room, we most of us carry our wounds outside of plain view, and only through chance, or magical X-ray vision, do they come into view. Or maybe they're always there, bulging at the surface like red, angry hives. It's just that we're staring so hard into the middle distance that we safely avoid them.
"I wish the best for your son," she said to the man as they walked off the plane. He nodded. " 'Preciate that," he said, as they headed their separate ways, she to the shuttle that would take her to her downtown hotel, he to the far end of the airport for the long flight to an oil platform in the middle of the sea.
Friday, November 16, 2007
Friday, October 26, 2007

HAPPY HALLOWEEN!
My father often comes to visit for Halloween so we can carve pumpkins together. It's an all-day affair involving much planning and an ever-changing set of tools. One of the best discoveries came to us via Martha Stewart, whose show my father used to watch at the gym. She says that an ice cream scoop is the best implement for carving out the guts of a pumpkin, and indeed it is.
One year, my father brought his power drill, and we drilled patterns in our pumpkins. He created a witch on a broomstick, and I made random geometric patterns. Another year, we stenciled our pumpkins and cut out moons and stars.
This year, my father's not coming for pumpkin carving, and I haven't been inspired to do it on my own. But, one day this week while I was walking Buddy, I noticed that the little shop around the corner had two pumpkins on the stoop, each one decorated with various pieces of hardware and twisted wires. Delighted, I ran out to choose my own pumpkin, and today I dug around in the basement to collect an assortment of hardware odds and ends of my own. I even found a spool of wire and a pair of wire cutters to make twisted lengths of hardware hair.
The beauty of this approach to "carving" a pumpkin is that it requires no carving. Once you have the pumpkin and the hardware, you simply screw in the hardware eyes and nose and mouth and ears and hair in whatever arrangement is pleasing to you, and voila! Hardware Pumpkin Man is ready. Happy Halloween!
Monday, October 08, 2007
SJG
What is she to me?
She is the one they wave to, bus drivers, children, all the neighbors, colleagues in the elevator, mechanics, strangers too.
She is the dancing girl, grinning for the camera in the Luxembourg Gardens.
She is softness in the dark, warm hands that cup my curves.
She is memory, Helen’s kitchen, its pies, fried chicken, eggs and bacon and coffee, Swiss steaks, TV dinners (just the good parts); Bud and Bob’s on Sunday afternoons; Edna’s Christmas cookies, pork cutlets fried just right, pickles (no garlic), endless Jell-O salads, and the fudge the dog ate (was it Tinkerbelle?).
She is the Big Pool, cold limbs pulling in cement’s warmth, plunging back into the waters to start the cycle again, cool waters, warm cement, cool waters, warm cement, a body-firing in summer’s heat.
She is radiance of golden energy, the aura that pulls me in.
She is the one to make me laugh (even though I did once say she isn’t funny), to show me humor in tragedy in absurdity in myself sometimes.
She is the one who knows sorrow, balancing joy on its precipice.
She is the one who sees beauty in silence, snowflakes drifting out of grey sky, yellow leaf settling on lake’s surface, orange fire-moon rising from the horizon.
She is the girl in the dark alley, the one to whom I said, “I need you.”
She is the woman I love.
--on the occasion of our twenty-fifth anniversary
Tuesday, August 21, 2007

AUGUST BOUNTY
Phlox bloom in my garden in the hot, humid days of August, when the nights begin to cool and the gentlest touch of autumn is in the air. In this part of the world, the harvest is at its ripest now. Roadside farmers secret extra ears of corn into each bag, green beans spill out of marketplace baskets and cartons, and luscious, ripe tomatoes, once treasures, weigh the basket as commonplace loads.
Saturated with bounty, August yet calls forth a note of sadness in the evening cicada’s song, its single-note melody somehow lonesome, its empty carapace a morningtime souvenir of another lifetime. As children, we prodded the insect’s shell and sipped the tender sap of phlox’s flower. Still these tokens take me there, to that youthful place of song and fruit and endless, wondrous mystery.
Saturated with bounty, August yet calls forth a note of sadness in the evening cicada’s song, its single-note melody somehow lonesome, its empty carapace a morningtime souvenir of another lifetime. As children, we prodded the insect’s shell and sipped the tender sap of phlox’s flower. Still these tokens take me there, to that youthful place of song and fruit and endless, wondrous mystery.
Sunday, July 08, 2007

GRILLED PIZZA
Oblivious to the ozone warning on a recent hot, steamy day in our nation’s capital, my father and I headed out for sightseeing. We took the Metro and then the city bus to Mount Vernon, the property just outside of Washington, D.C., that George and Martha Washington called home. The house itself is surprisingly modest, yet it is in an incomparable setting. Perched on a bluff overlooking the Potomac, the site commands a wide, impressive view of the river and surrounding lands. We took full advantage of the Washingtons’ verandah and the cooling breezes that wafted up to us there from the river below. Sitting on simple wooden chairs, we wondered if Martha served George iced tea or mint juleps on hot summer days more than two hundred years ago.
Today, back at home, it’s similarly hot and muggy. Air temperatures are in the high nineties and the dew point is somewhere close to seventy. We have more pedestrian concerns before us than to wonder what George and Martha sipped on their back porch. We have dinner to make, and in oppressive heat. The solution? Pizza on the grill outside. It’s amazingly quick and easy!
Pizza Dough
To make things simple, buy prepackaged pizza dough. Otherwise, you can make your own dough as follows:
1 package quick-rising yeast
1 teaspoon sugar
1 cup hot water (between 105-115 degrees)
3 cups flour
1 teaspoon salt
¼ cup olive oil
1 tablespoon fresh rosemary, choppped
1. Sprinkle the yeast and sugar into a cup of hot water. Let sit for about 10 minutes, until the yeast bubbles nicely.
2. Meanwhile, mix the flour and salt in a large mixing bowl. When the yeast is ready, pour into the flour and stir. Add the olive oil and rosemary. Stir until well blended and slightly tacky to the touch.
3. Knead the dough on a lightly floured surface for about 10 minutes.
4. Place the dough in a large bowl lightly oiled with olive oil. Cover with plastic wrap or a kitchen towel and let the dough rise in a warm, draft-free place for about an hour. The dough will easily double in size.
5. When the dough has risen, punch it down gently and divide into four pieces.
6. Shape each piece into an 8-inch round (or as close thereto as you can). You can either do this with your fingers and hands or with a rolling pin.
7. Place each piece of dough onto an individual, oiled pizza pan, cutting board, or large plate. Cover with towels or plastic wrap and allow to rise another 30-60 minutes. Meanwhile, prepare your toppings.
Toppings
You can use your favorite prepackaged pizza toppings: grated cheese, sliced meats, olives, sliced vegetables (which you’ll then want to roast or sauté ahead of time), and whatever else appeals to you. I roasted my own garlic (one big bulb in the oven early in the morning), roasted my own vegetables (two eggplants and two red peppers; see the previous “Rear Window” blog entry for how-to information), bought two small containers of local goat cheese, and grated about 3 cups of domestic mozzarella.
To prepare the pizzas:
1. Preheat the grill.
2. When the grill is ready, turn to medium heat. Brush a little olive oil on one side of each pizza round. Place the pizza rounds directly onto the grill, oiled side down. My grill fits two rounds at a time, but if you have a larger grill, you can do all four at once. I found it easiest to pick up the rounds with my hands and place each one gently onto the grill.
3. Grill each piece quickly for about 1 or 2 minutes, with the lid down, just until the dough has set. It may begin to turn brown and take on lovely grill streaks.
4. Remove each pizza round from the grill, using tongs. Take them back into the kitchen and lightly brush the ungrilled side of the dough with a little more olive oil. Then arrange the toppings of your choice onto the grilled side of each round. I started with the roasted garlic, then a little grated mozzarella, then the roasted veggies, then the goat cheese and a bit more mozzarella. Drizzle each pizza with a little olive oil or vinaigrette (homemade or bottled both work).
5. Return the pizza rounds to the grill, topping side up and ungrilled side down. Close the lid of the grill and allow the cheese to melt. This takes about 5 minutes.
6. Remove the individual pizzas from grill using tongs. Serve the pizzas with a simple green salad. Enjoy!
*Makes four individual 8-inch pizzas, enough to feed 4-6 people.
Friday, June 29, 2007
REAR WINDOW
An alley. Three adult men and a young boy pass by, their laughter and voices floating up to where we sit on a back porch three flights up. Loud music blasts out of an apartment across the way. A light comes on in a nearby window. A man comes into view, wearing only his underpants. He walks over to the computer in his study. The window at his desk is shaded and the man disappears into shadow profile. The music stops. An alley inhabitant, drinking his evening beer at the dumpster below, applauds. Summer in Chicago.
We’ve come to visit friends in the city for my birthday weekend. The alley scene is our own private rear window, like the memorable Hitchcock film starring James Stewart as the voyeur and Grace Kelly as his intrepid love interest. As in that movie (set in New York), here in Chicago we have a view into the lives of strangers whose stories we can only guess at. Poverty and affluence, loneliness and camaraderie, tragedy and comedy all in this one spot, in this one evening.
As the man at the dumpster opens another beer, our hosts bring out the cold tapas for our evening meal: garbanzos with mustard greens; potato salad with chopped boiled eggs and a touch of horseradish; a salad of green and black olives and crunchy pearl onions; and roasted eggplant and red peppers in a garlicky marinade. An egg-based tortilla topped with fresh asparagus precedes the main course—seafood paella.
It’s hot and muggy, and when we drive home the next day, the weather hasn’t changed at all. We decide to make the eggplant tapas for our evening meal. It’s quick and easy, and by grilling outside, we can keep heat out of the house. As we eat our meal on the back deck, we’re serenaded by cardinals at the birdfeeder and by our neighbor’s electric saw. Our cats stretch out along the screen door where the breeze is best. We humans provide the rear window action in their feline world.
You can make the roasted eggplant tapas on your own grill. In the heat of the summer, it’s a perfect meal.
Roasted Eggplant in Marinade
2 eggplants, sliced thickly
2 large red peppers, whole
2 lemons, seeded and juiced
¼ cup – 1/3 cup olive oil
4-6 cloves fresh garlic, pressed
Salt, to taste
1. Preheat the grill.
2. Cut the ends off the eggplants. Then cut each eggplant into slices about an inch thick each. Brush a little olive oil onto each side of the slices.
3. Place the eggplant slices and the whole peppers on the heated grill. Turn frequently, keeping the heat somewhere between 350 and 400 degrees.
4. Roast until the skin of the peppers is black and the eggplant slices are nicely blackened and soft—about 20 minutes or so. The peppers and the eggplant will be done at about the same time.
5. Take the vegetables off the grill and allow them to cool before handling. Cut the eggplant slices into bite-sized chunks. Then remove the blackened skin from the peppers along with the stem, seeds, and any remaining pith. Slice peppers into strips and combine with the eggplant in a large serving bowl.
6. To make the marinade, combine the juice of 2 lemons with the olive oil. Stir in the pressed garlic and salt. Drizzle over the eggplant and peppers. Serve at room temperature or cold, whichever you prefer, with slices of crusty baguette or wedges of pita bread.
*Serves 6
Friday, May 25, 2007
YOGA DIARY
Part of teacher training at the Iyengar yoga studio where I attend class is to keep a daily practice log. I'm not in the teacher training program, but I do sometimes keep notes on my practice just to see what it amounts to on paper and to master the Sanskrit names of the asanas (poses). Today's practice looked something like this:
INVOCATION to Patanjali, the codifier of yoga. As I begin chanting, the dog and the cats come racing to see what's up. Buddy (the dog) licks my face energetically.
STANDING POSES
--Urdhvahastasana
--Uttanasana (2 minutes, with head supported on block and blanket)
--Adho Mukha Svanasana. I alternate legs in the one-legged variation we learned this week to get the heel on the floor closer to the ground.
--Trikonasana. As I extend to the right side, I catch the slatted blinds reflected in the framed photograph of the House on the Hill, my mother's great uncle Virgil Hines's home in southern Missouri. I've just been to that part of the world to scatter my mother's ashes. I like seeing my life (the blinds) overlaid onto hers (the House on the Hill).
--Utthita Parsvakonasana
INVERSIONS
--Adho Mukha Vrksasana (full arm balance). We're learning to do this pose free standing. Going up into the pose farther away from the wall is the first step. I start nine inches from the wall, and as I kick up, my foot scrapes hard against the marble top of my great grandmother Covert's parlor table. China goes crashing, and the animals come racing to see what's up.
--Sirsasana (6 minutes, without wall support). I took a year off my yoga practice recently because of hamstring problems. I returned about four months ago, a little creaky but still strong. Before my leave, I'd been able to routinely go up into and come down out of headstand in the center of the room. I've been frightened to do so, until today. I am able to stay up for six minutes and come down, for the first time in a long time, without crashing to the floor. Legs poker stiff and core muscles firm.
FORWARD BENDS AND SEATED POSES
--Janu Sirsasana. This forward bend incorporates a difficult hip/groin rotation and demands an intense stretch of the extended hamstring. It has never come easily, and I resist the pose's difficulties. So I keep at it.
--Padmasana. Another difficult pose requiring openness in the hips and knees. I'm getting to the point where I can fold both legs into the body for the full lotus pose instead of only one leg at a time. I close my eyes and fold my hands in front of my chest in namaskar. The animals sense a change of energy and come racing to see what's up.
SUPINE POSES
--Supta Virasana (4.5 minutes)
--Supta Baddha Konasana (5 minutes)
INVERSION
--Sarvangasana (5 minutes). We learned a variation of shoulder stand this week whereby the practitioner somersaults up onto a bolster or pile of blankets to get into the pose. The bolster helps lift the body and prevent the settling into the hips and stomach area that often comes as the practitioner remains in the pose for some time. Sarvangasana is meant to soothe the nerves, which in the early years of practice seemed laughable. I am better able today to relax the neck and throat and to unclench the teeth. My shirt slips down a bit in front, exposing my stomach muscles, which I admire. I pull my mind away from this momentary distraction.
FORWARD BEND
--Paschimottanasana (3 minutes). Another difficult pose for me these days, so I keep at it. We are taught to exhale tension in the stomach and groin to better surrender into the pose. Just as I feel a bit of surrender, the timer goes off (2 minutes). Our teacher says a true yoga pose begins only after the practitioner stops fighting against the asana, so I set the timer for another minute.
END OF PRACTICE
--Savasana (22 minutes). This pose always concludes a yoga practice. We've been doing increasingly longer savasana in class. This is the first time I've done such an extended savasana at home. I work on letting go of words and on allowing the energy to release into the back of the body, like blood settles in a corpse (savasana means "corpse pose" and is practiced to tame the breath and the mind). The oldest cat, the one who is most keenly attuned to shifts in energy, settles into the narrow space between my ankles. I feel contentment.
Friday, May 04, 2007
SOUTHERN STYLE
"Grease and gravy," commented the desk clerk. "That's what we're all about down here!"
I chuckled in response to her comment, a coda to the discussion about Southern cooking we'd had with the hotel desk staff since arriving the night before. Just off the interchange of Interstate 70 and state highway 63 in Columbia, Missouri, the hotel was our stop for the night en route to the Missouri Ozarks to scatter my mother's ashes in the landscape of her family roots. The city is also the place where my sister and I were both born.
For dinner that night in Columbia, we indulged in chicken-fried everything, green beans with ham, mashed potatoes, white gravy and biscuits, and coconut cream pie. When we got back to the hotel, the young woman at the desk showed off her own meal--brought to her by her roommates--of fried chicken, mashed potatoes, gravy, biscuits, and greens. "We mix greens with cabbage down here and add hot spices," she clarified.
The next morning, news of our meal had spread, and the morning staff asked for a full report of our choices. They listened intently and with genuine interest, smiling with a kind of pride as we talked about the central ingredients of Southern cuisine.
The fried chicken recipe we make at home, in the faraway North, was given to SJG long ago by a coworker from the Deep South. It's spicier than the fried chicken my mother used to make (she seasoned the chicken with salt and pepper only). It is delicious, easy to make, and tastes even better the next day.
Southern-Style Fried Chicken
6 skin-on chicken thighs or drumsticks
1 or 2 cups white flour for dredging
1/2 cup canola oil
4-6 bulbs fresh garlic, squeezed through a garlic press
salt, pepper, paprika, dried dill, and cayenne--all to taste
1) Rinse chicken in cool water.
2) Put the flour in a plastic bag; dredge the chicken in the flour.
3) Heat the oil in a heavy frying pan (we use a cast iron pan) until nice and hot.
4) Put the chicken in the hot oil, skin side up.
5) Squeeze the fresh garlic into the sizzling oil (rather than directly onto the chicken pieces).
6) Season the chicken with salt, pepper, paprika, dried dill, and cayenne.
7) Brown the chicken on both sides.
8) Line a cookie sheet with aluminum foil. Place the chicken on the foil, skin side down. Re-season with the spices (except the garlic).
9) Bake in a 350-degree preheated oven for 30 minutes.
10) After 30 minutes, flip the chicken so that the skin side is up. Bake another 30 minutes more.
Serve with mashed potatoes, white gravy, biscuits, and greens or green beans. Enjoy!
Tuesday, May 01, 2007

Crossing the Piney
I crossed the River Styx today,
Its current hard and swift.
In swallows' dip and swoop,
In vultures' circle dance,
I let her go at last.
Sparkle sun and light-blast lustre
below the limestone bluff;
All green and smooth
the water there,
While down below
In rippling current's flow
The petals loosed, the ashes too,
I gave her back at last.
On memory's tide
In fading golden hues
I crossed the River back again.
The water cold
Its promise sure
To take her home at last.
--for my mother (above)
1934-2002
Saturday, February 24, 2007

IN SUCH A LANDSCAPE
Thwappp! A flying object smacked into my thigh. Ketchup oozed down my leg and bits of pickle shattered across my hand. A hamburger hit. Tossed out of a speeding car, already long gone, right under a perfectly cloudless desert sky. Who could imagine, in such a landscape?
I suppose I was the perfect target. A lone pedestrian along a busy speedway strip. Head down in meditative reflection, walking back to a neighborhood spa to meet up with SJG, who had been convinced, rather reluctantly, to do a mud wrap on our first day in Tucson. As I wound through the quiet streets off the speedway, admiring the orange trees and the small adobe homes with their cactus gardens and brightly colored doorways, a young woman and her two friendly dogs came out of an alley ahead of me. The dogs made a beeline for my sticky legs and eagerly licked up the ketchup as I fell into conversation with their owner. She reassured me that Tucson is an otherwise friendly town, and I felt better for the encounter.
I later learned that burgers-as-food-missile is a growing trend on the West Coast. There, in LA in particular, the trick is to toss fast food into the car next to you just as you’re taking off from a green light. While it is unnerving to be struck by flying food, there’s an element of absurdist humor to the whole thing. After all, we’ve been tossing tomatoes and eggs and pies at one another for a long time, and various comedic entertainers have played on this expression of hostility to great effect. We laugh at the Three Stooges, at Johnny Carson, at Debbie Reynolds and Martin Short, at their glee at tossing a pie or at their feigned shock as victim. Go to http://www.piesintheface.com for an entire catalog of such humor. And sure enough, SJG doubled over with laughter as I recounted the adventure, as did the other guests at our bed and breakfast later that day.
So, in a spirit of good humor, and for another truly memorable burger, try this recipe, which we make at our house on the grill in summer or under the broiler during the winter.
TURKEY BURGERS
1 pound ground turkey
1 egg
½ cup oatmeal (finely cut flakes)
2 cloves crushed garlic
1 small chopped onion
2 tablespoons Dijon mustard
1-2 tablespoons Worcestershire sauce
salt and pepper, to taste
a couple shakes of Tabasco sauce (optional)
While the grill is preheating, mix all the ingredients together in a large bowl. Shape into patties. Place a sheet of tin foil on the heated grill. Place the turkey patties on the tin foil and grill on both sides until done.
Sunday, February 11, 2007
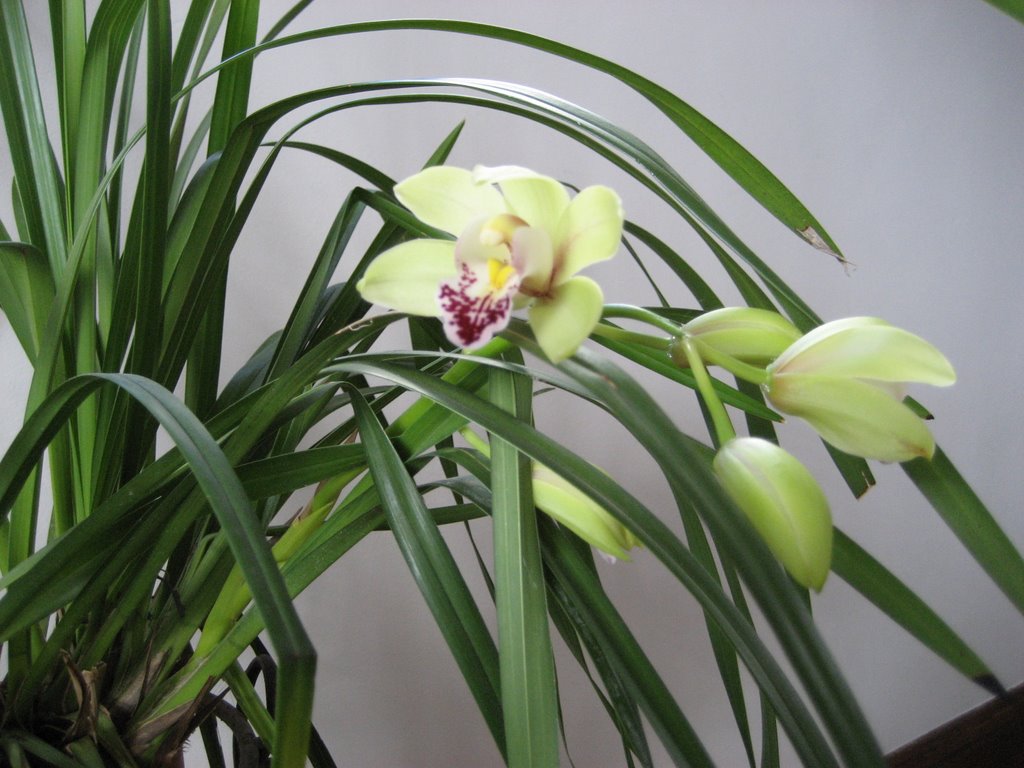
BLOOMING CYMBIDIUM
Orchids produce flowers on their own schedule. A catleya I bought long ago after a trip to Key West bloomed well initially, then sat dormant for several years before coming alive last winter after I put it in the warmth and humidity of the upstairs bathroom. Five Decembers ago, when my mother died, my sister chose the cymbidium plant pictured above for its profuse flowering. We cut the stems, wrapped them in satin ribbon, and placed them atop our mother's casket to be cremated with her. I haven't had the heart to toss the plant, even though it too has remained dormant all these years. True to the mysteries of the species, six buds appeared suddenly last week, opening slowly to reveal a delicate beauty well worth the long wait.
Saturday, January 20, 2007
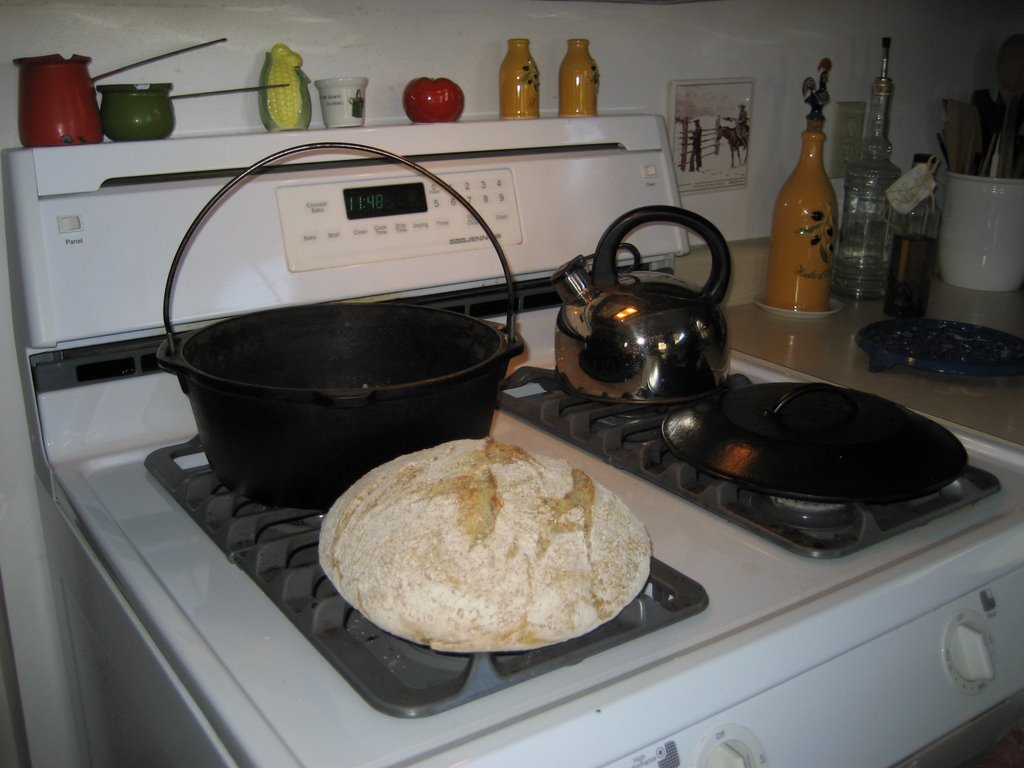
A BEAUTIFUL BOULE
My father and my sister are the breadmakers in the family. Their loaves always turn out like pieces of art--crisp golden crusts, airy light interiors--with no special effort on their part and with very little attention to the recipe itself. I, on the other hand, slavishly follow every step with scientific precision and end up with dense, disappointing loaves.
While in town for his seventy-sixth birthday earlier this month, my father made a loaf of no-knead bread. It requires very little yeast and relies instead on time (about 20 hours) to raise the dough. He's sloppy and impatient as a baker, rushing through every step to get the thing done with. When he was finished, the kitchen was covered in flour, as was he, but the result was stunning--a gorgeous golden boule, split open at the top, flowerlike, and dusted in a sprinkling of flour.
I tried to recreate the boule this weekend, and though mine is lovely enough (see photo above), it's not truly splendid. But, I'm determined to keep trying, using the very easy recipe (below) that my father saw in the New York Times last year.
NO-KNEAD BREAD
(from the New York Times as adapted from the city's Sullivan Street Bakery)
3 cups flour
1/4 tsp yeast
1-1/4 tsp salt
1-5/8 cups water (warmed in a pan, just to take off the chill, and to no more than about 120 degrees F)
flour, cornmeal, or oat bran, as needed
1. Combine flour, yeast, and salt. Add the warm water and stir until blended. The dough will be sticky and shaggy. Cover the bowl with plastic wrap and let is rest for 18 hours in a warm room. (I set the bowl on top of a towel or two and put the whole thing on top of a warm radiator.)
2. Eighteen hours later, check the dough. It is risen sufficiently when the surface is covered with small bubbles.
3. Place the dough on a lightly floured surface and sprinkle a little more flour over the dough itself. Fold it over on itself once or twice. Cover loosely with more plastic wrap, and let it sit for 15 minutes.
4. Then gently shape the dough into a ball. Coat a cotton kitchen towel with flour, cornmeal, or oat bran. Put the bread, seam side down, on the towel and dust with a little more flour, cornmeal, or bran. Cover with another towel and let the dough rise for 2 more hours.
5. Half an hour before the dough is ready, heat the oven to 450 degrees. Put a heavy covered pot (I use a cast-iron Dutch oven) in the oven as it heats. When the dough is ready, remove the pot from the oven. Turn the dough into the pot, seam side up. Shake the pot a time or two to more evenly distribute the dough. Cover with the lid and bake 30 minutes. Then carefully remove the lid (watch out for escaping steam!) and bake for another 10-15 minutes to brown the crust.
Cool on a rack. Makes excellent toast!
Subscribe to:
Posts (Atom)
